Info, tips and guides
Bugs
Documents
FAQs
Links
Where to buy
Downloads
TAPs
Linux tools
Mac tools
Windows tools
Toppy firmwares
Search
Forum FAQs
Forum index
Forum search page
Tools
Toppy.org.uk
TF5800 manual: organising recordings
Organising recordings
When you’ve recorded more than a handful of programmes,
you’ll realise that
it can take some time to find the things you want to watch after pressing
the Archive button![]() on the remote, as you have to move up and down the list,
through pages of names, to find the programme you’re looking for.
on the remote, as you have to move up and down the list,
through pages of names, to find the programme you’re looking for.
Fortunately, there are lots of ways that you can make it easier to find things, besides just deleting recordings using the White button on the remote.
Normally, the most recent recordings will appear at the bottom of the archive list, but you can also view the list by name or size of the recording.
To do that, press the Blue button, and you’ll see this menu appear.
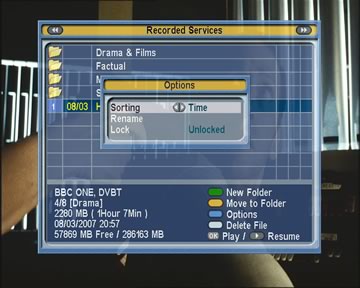
The Sorting option can be set to Time, Size and Alphabetic.
Renaming recordings
If you want to change the name of a recording – perhaps to add a better description, for example – move to it in the archive list, then press the Blue button, and select Rename.
You’ll see an on-screen keyboard appear, like this
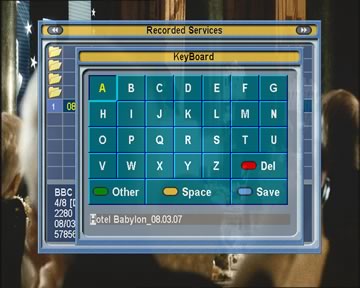
It works just the same way as we explained above, when we looked at Favourites. Just select Save when you’ve changed the name, or press Exit on the remote to abandon the changes.
Organising recordings
One of the best ways to organise your recordings is by sorting them into folders, just like you organise the folders on your computer’s hard disk. To create a new folder, press the Green button on the remote control. The first new folder will be called GROUP 01, and you can rename it to something more meaningful using the Blue button, as we’ve just described.
To put a recording into a folder, move to it and then press the Yellow button on the remote. You’ll see a screen like this
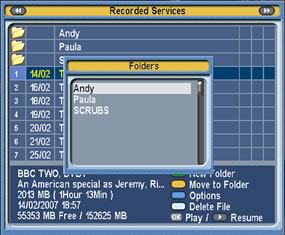
Just highlight the folder that you want to put the programme in, and press the OK button.
You cannot move a programme into a folder if there is already one with the same name in that folder. Rename one of the programmes first.
You can see the contents of a folder by selecting it in the list and pressing the OK button, and you can create folders within one another.
To move up from a folder, select the option labelled with two dots, at the top of the list. You’ll see it appear at the top of the list of files in a folder, and if you’re in a folder and try to move a file, it will also appear as one of the destinations. To move a file from a folder back to the top level, select ‘..’ and press OK.
Copying recordings
Sometimes, you might want to make a copy of a recording, or just of part of it – your favourite scene from a film, for example, or a song from a chart music show.
While you’re playing a recording, just press the Record button, and your PVR will automatically start making a copy, which will be named the same as the original programme, but with (COPY) in the title. The copy will stop automatically when the programme you’re watching comes to an end, or you can stop it sooner by pressing Stop on the remote control.
You can make a copy of a long recording more quickly by starting
to play the original recording, then pressing Fast Forward![]() until
the speed has increased to six times, then pressing the Record button. The
copy will be done at six times normal speed.
until
the speed has increased to six times, then pressing the Record button. The
copy will be done at six times normal speed.
You can also use the copy function for programmes that have been recorded from pay TV channels, to create a copy that can be played without your subscription card. By playing the programme and pressing Record to make a copy, the PVR will create a new recording that is not encrypted, and will have a green $ symbol next to it in the archive list to indicate that, rather than the yellow $ that indicates a programme is encrypted and will require a subscription card to play.
Note that copying and recording from Pay TV channels may be restricted by broadcasters, and the PVR should not be used to attempt to circumvent such restrictions.
Editing recordings
As well as copying recordings, your PVR allows you to edit recordings that are stored on the hard disk. So, for example, if you set a recording to start a few minutes early, you could remove the extra material at the start of it. Or if you just want to keep a small part of a programme, you can cut it out and save it, then delete the rest.
Because of the way that recordings are broadcast and saved on the PVR, the actual points at which edits are made may vary by a few seconds from the position you select on screen; for perfect results, you may find it easier to edit recordings on your computer.
To edit a recording, start playing the programme, and find the location where you would like to make the edit. Press the Play button to display the progress bar. While the progress bar is on screen, press the White button on the remote control, and the red marker will start flashing between red and blue.
Now, use the left and right arrows to move either forwards or backwards in the program. The part of the progress bar between the point where you first pressed the White key and the current position will turn purple.
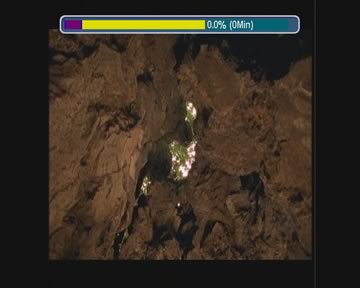
When you have highlighted the section of a program that you wish to either remove or save, press the Blue button, and this message will appear on screen.
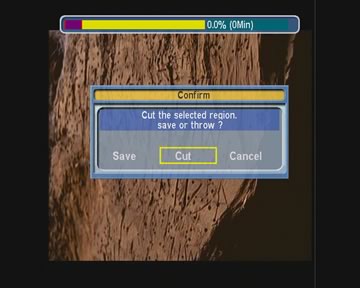
If you choose Save, then a new file will be saved containing just the section of the programme that you highlighted, and it will be removed from the original recording. This can be used, for example, to extract just a part of a programme.
If you choose Cut, the portion of the programme that you selected will be removed from the original recording, and will be lost. You can use this to remove extra material at the end or beginning of a recording; if you remove material in the middle, you may see some interference around the position where you made the edit.